How to set up single sign-on (SSO) with CyberArk
Last updated: April 20, 2026
Single sign-on with CyberArk lets your team access Influ2 using their existing CyberArk credentials — no separate logins needed, and security stays high.
Before you start, you'll need:
Admin access to your CyberArk account
Permission to launch and automatically deploy SAML applications in CyberArk
Your Influ2 client ID (request from your Customer Success Manager)
Steps to configure
Log in to your CyberArk account.
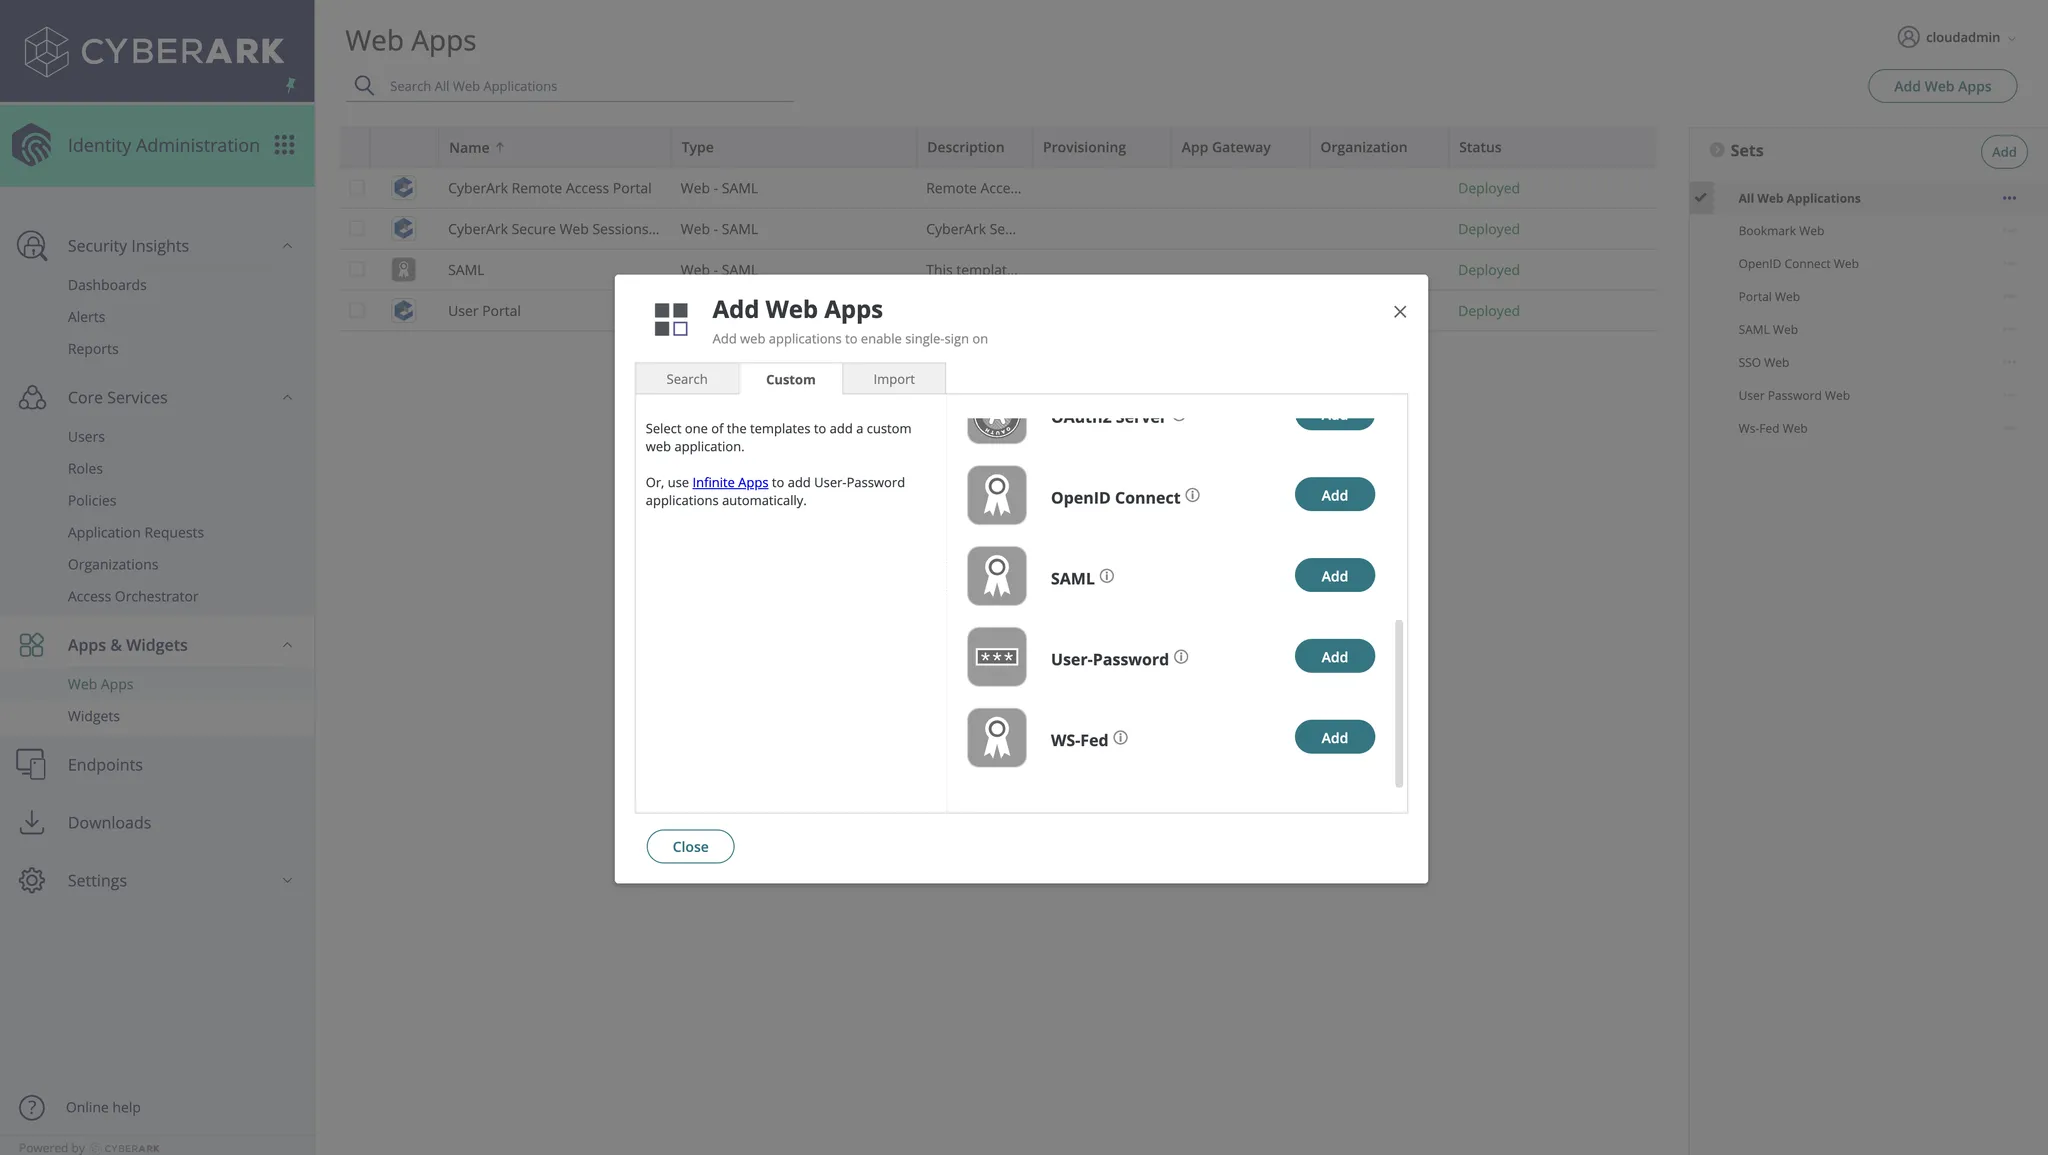
Go to Apps & Widgets and click Add Web Apps.
Open the app you just created and go to the Trust section.
Click Metadata and set the IdP Entity ID / Issuer field to
Influ2-SAML.
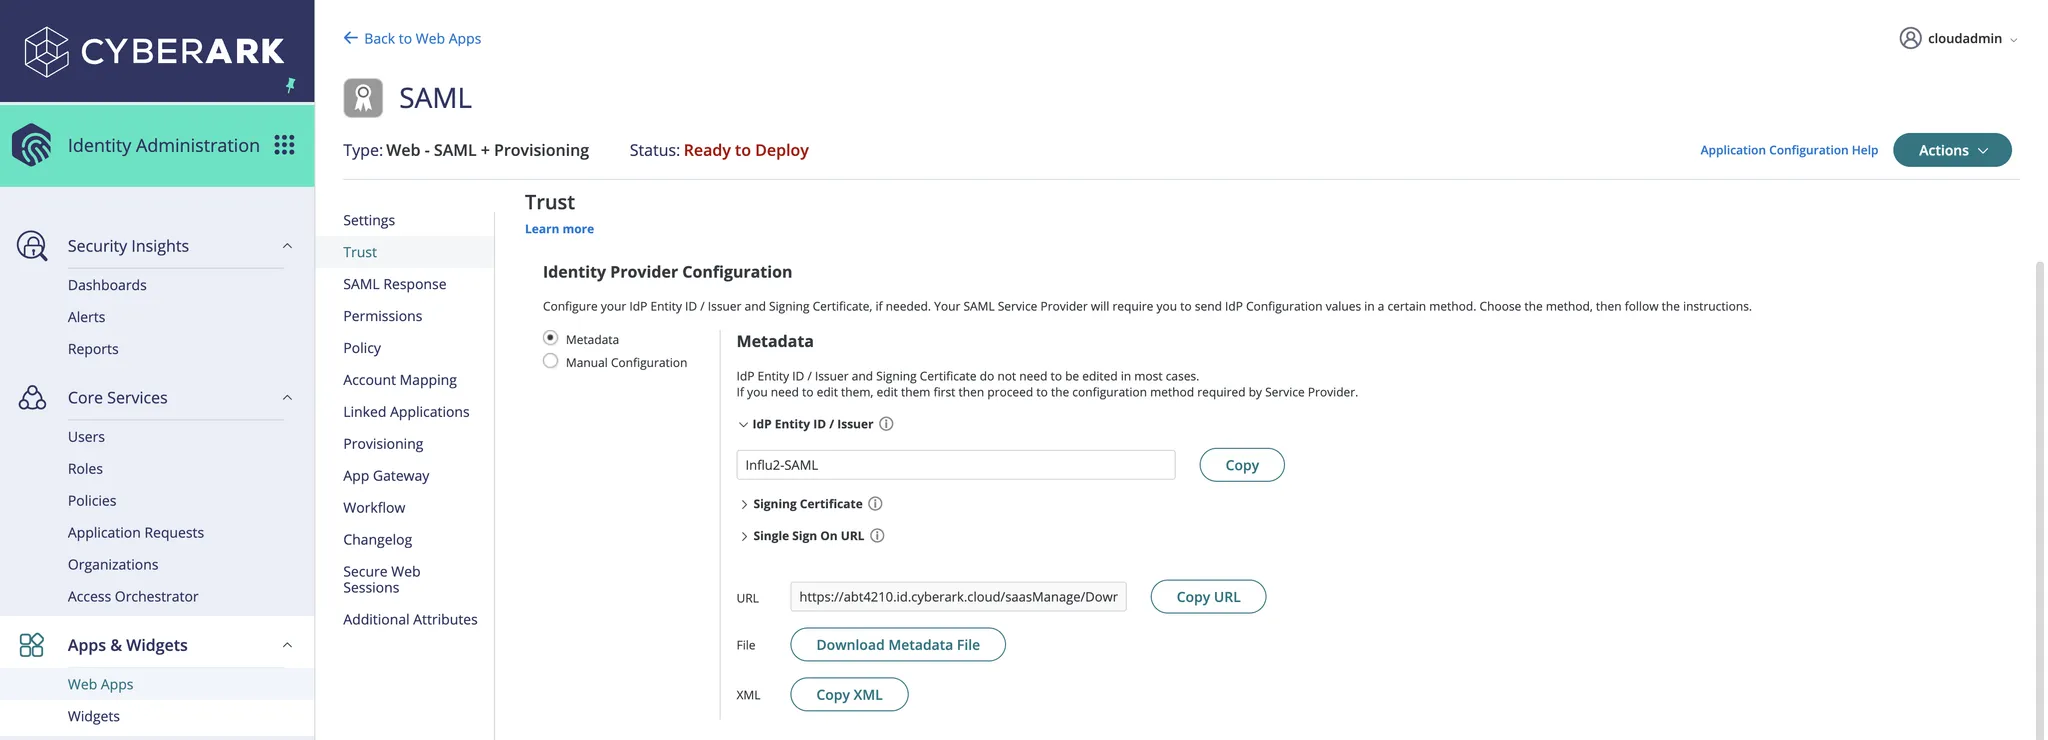
Next to the XML field, click Copy XML.
Provide this copied XML value to your Influ2 Customer Success Manager or Implementation Manager — they'll need it to complete the setup.
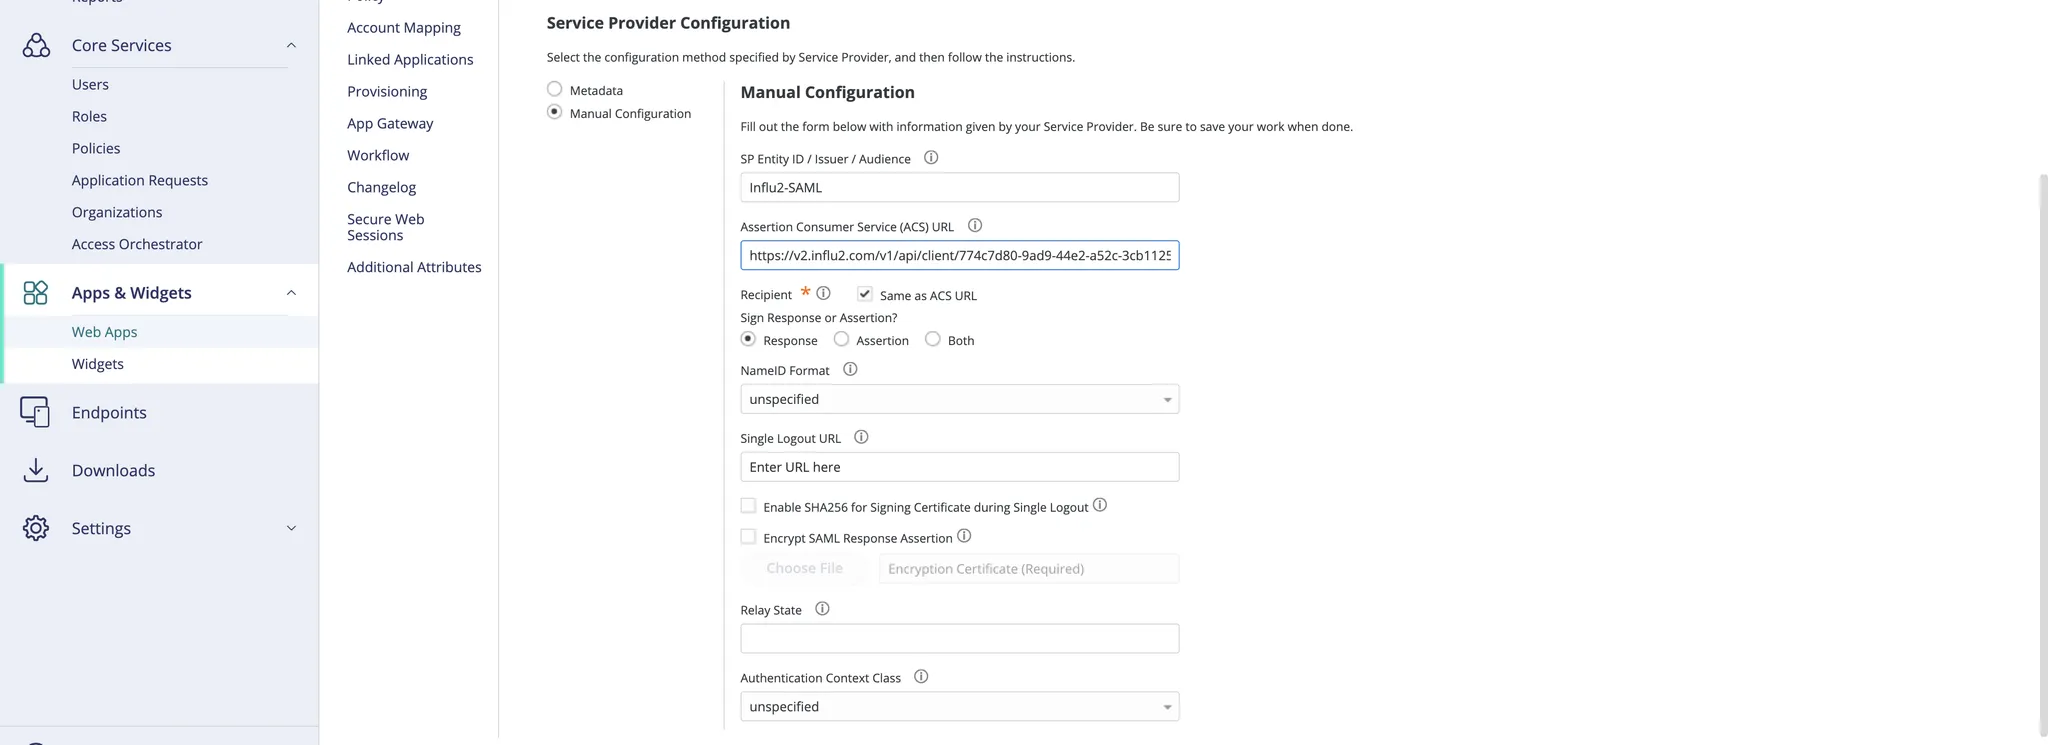
Click Manual Configuration.
Set the SP Entity ID / Issuer / Audience field to
Influ2-SAML.In the Assertion Consumer Service (ACS) URL field, enter:
https://v2.influ2.com/v1/api/client/{{your_client_id}}/samlsso/saml/acsReplace
{{your_client_id}}with the client ID from your Customer Success Manager.
Set Recipient to Same as ACS URL.
In the Sign Response or Assertion section, select Response.
Set NameID Format to Unspecified.
Set Authentication Context Class to Unspecified.
Go to the SAML Response section and create these attributes with the exact values shown:
userEmail→LoginUser.UsernamelastName→LoginUser.LastNamefirstName→LoginUser.FirstName

Go to Permissions and add a new user or user group with the required permissions.

Share the XML metadata with your Influ2 Customer Success Manager.
Once they complete the setup on the Influ2 side, your team can log in using CyberArk SSO.
What's next
Your team is now set up to access Influ2 using CyberArk credentials. New team members will automatically get access when added to the appropriate CyberArk group.