How to set up single sign-on (SSO) with Microsoft Entra
Last updated: April 20, 2026
Single sign-on with Microsoft Entra lets your team access Influ2 using their Entra credentials — streamlined login and centralized user management.
Before you start, you'll need:
Admin access to your Azure environment and Influ2 account
Permission to register applications in Microsoft Entra
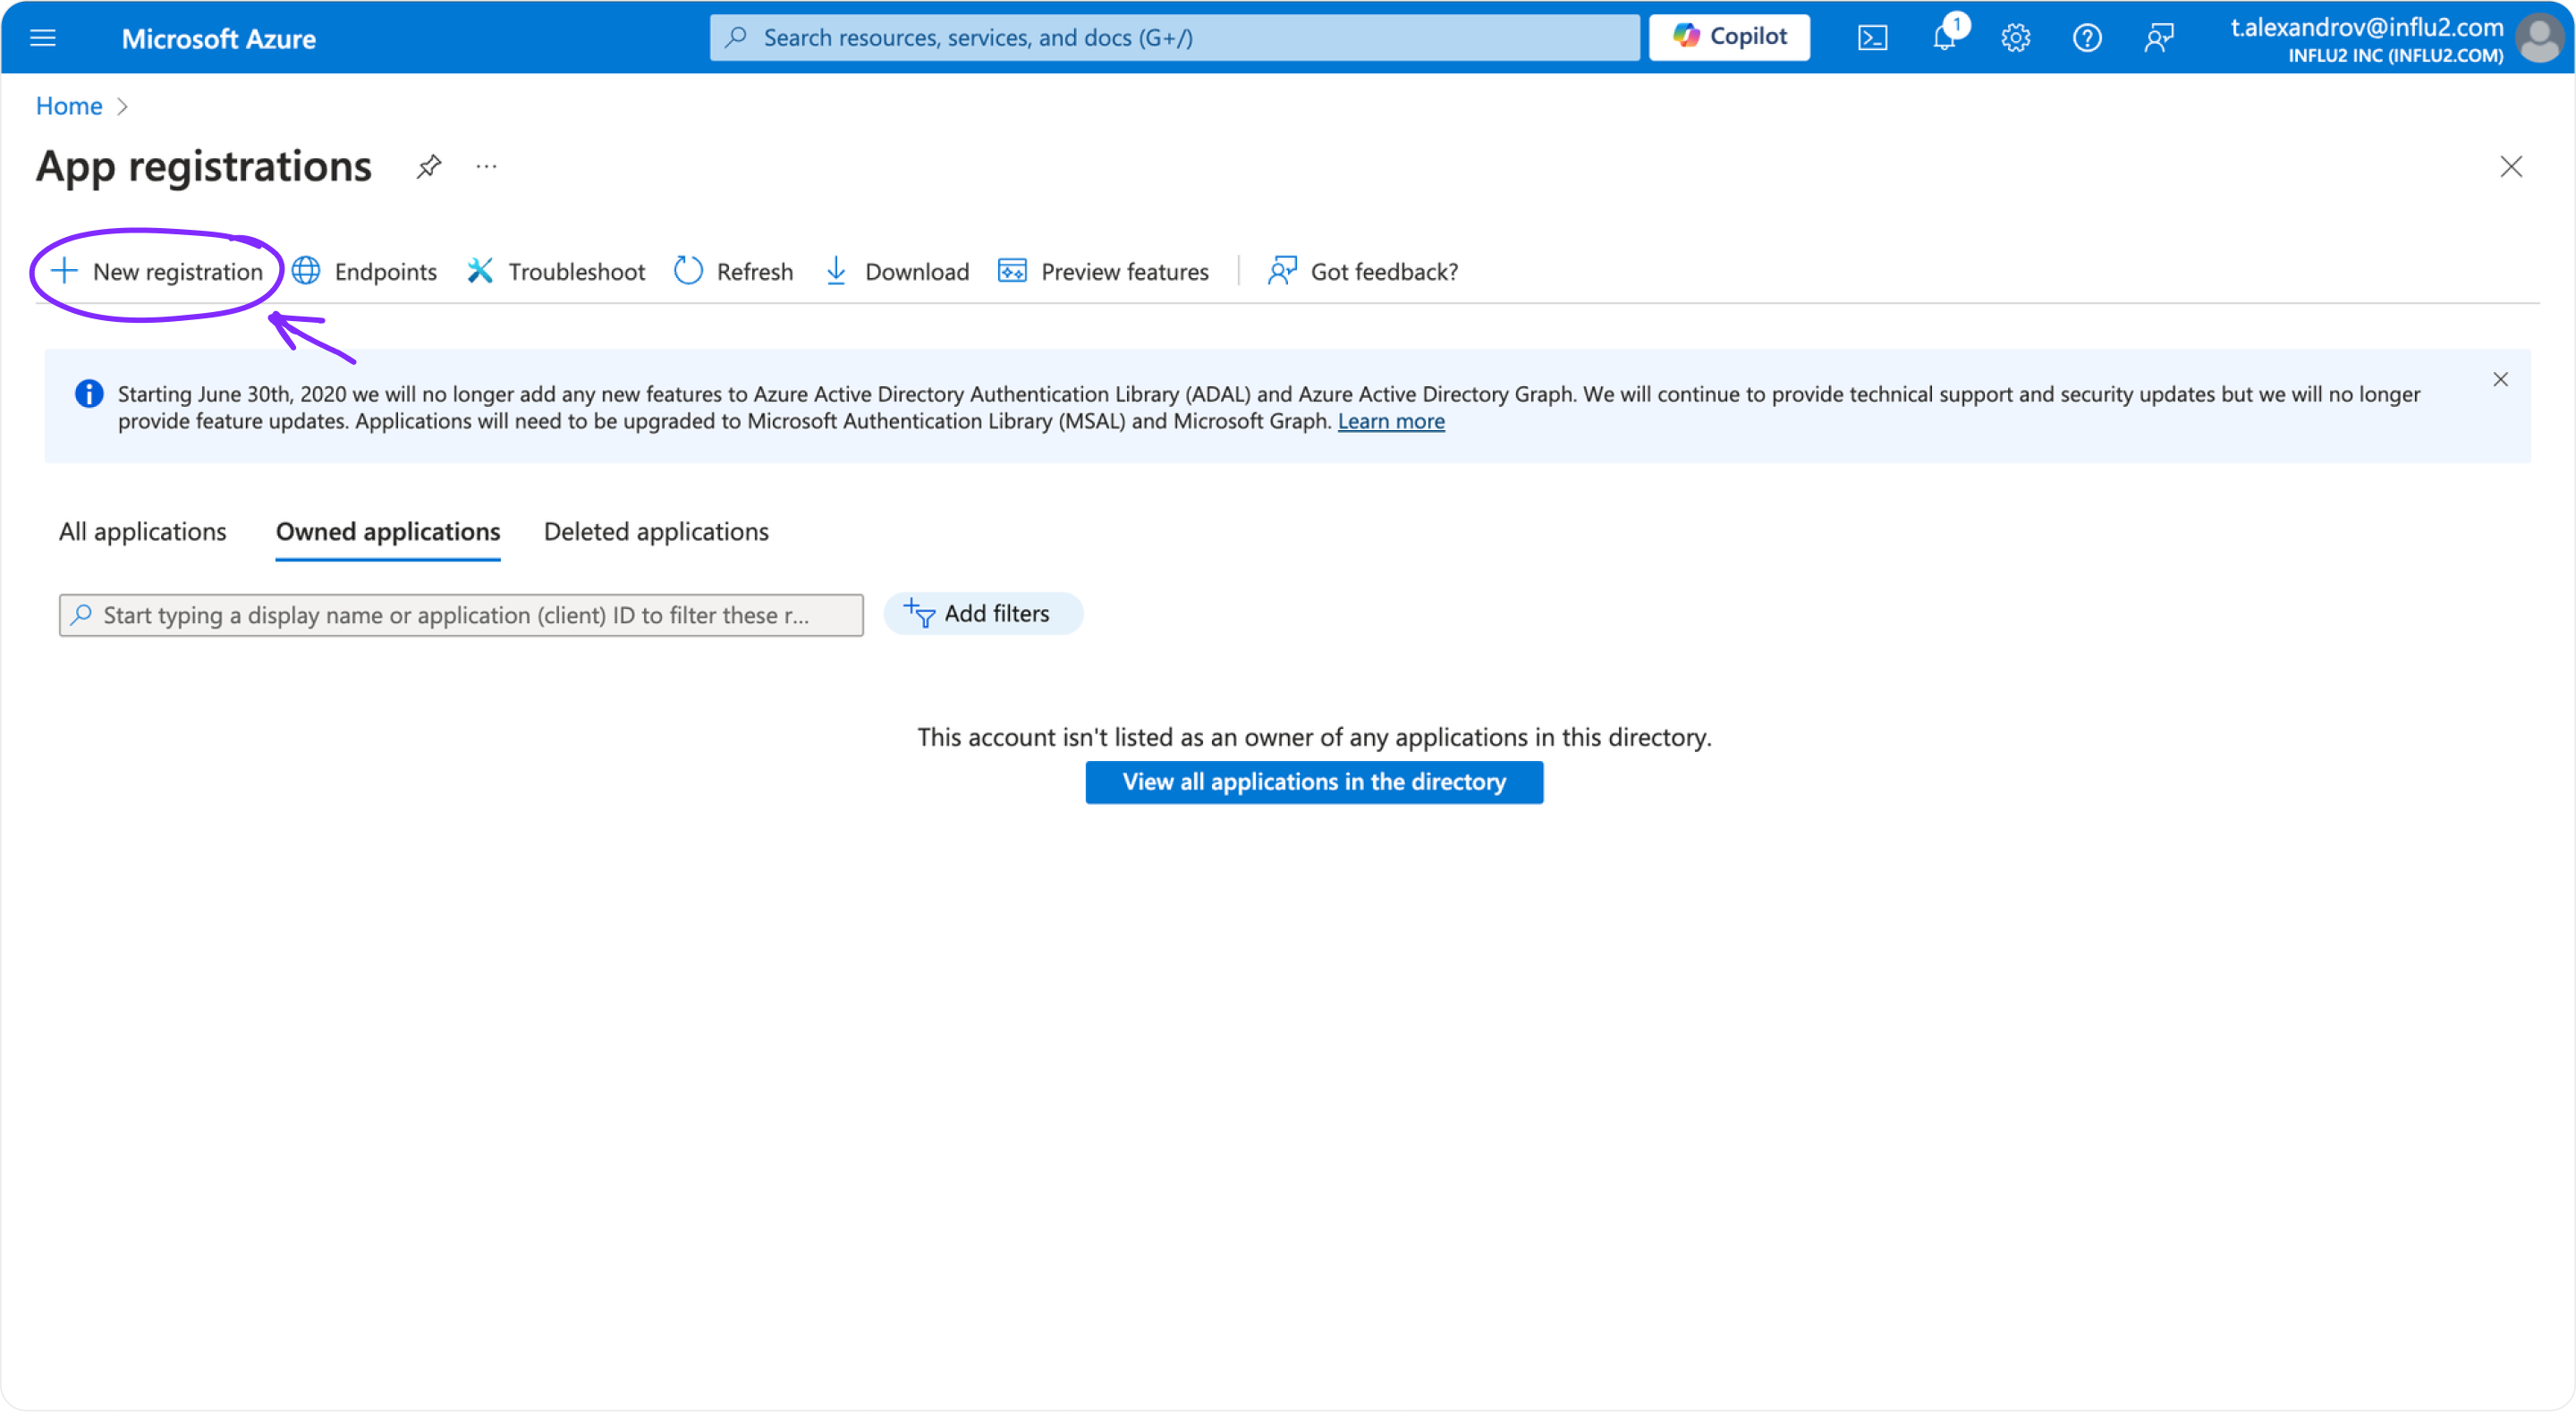
Step 1: Create an application in Microsoft Entra
Open the Azure environment and navigate to Microsoft Entra ID.
Go to App registrations and click New registration.
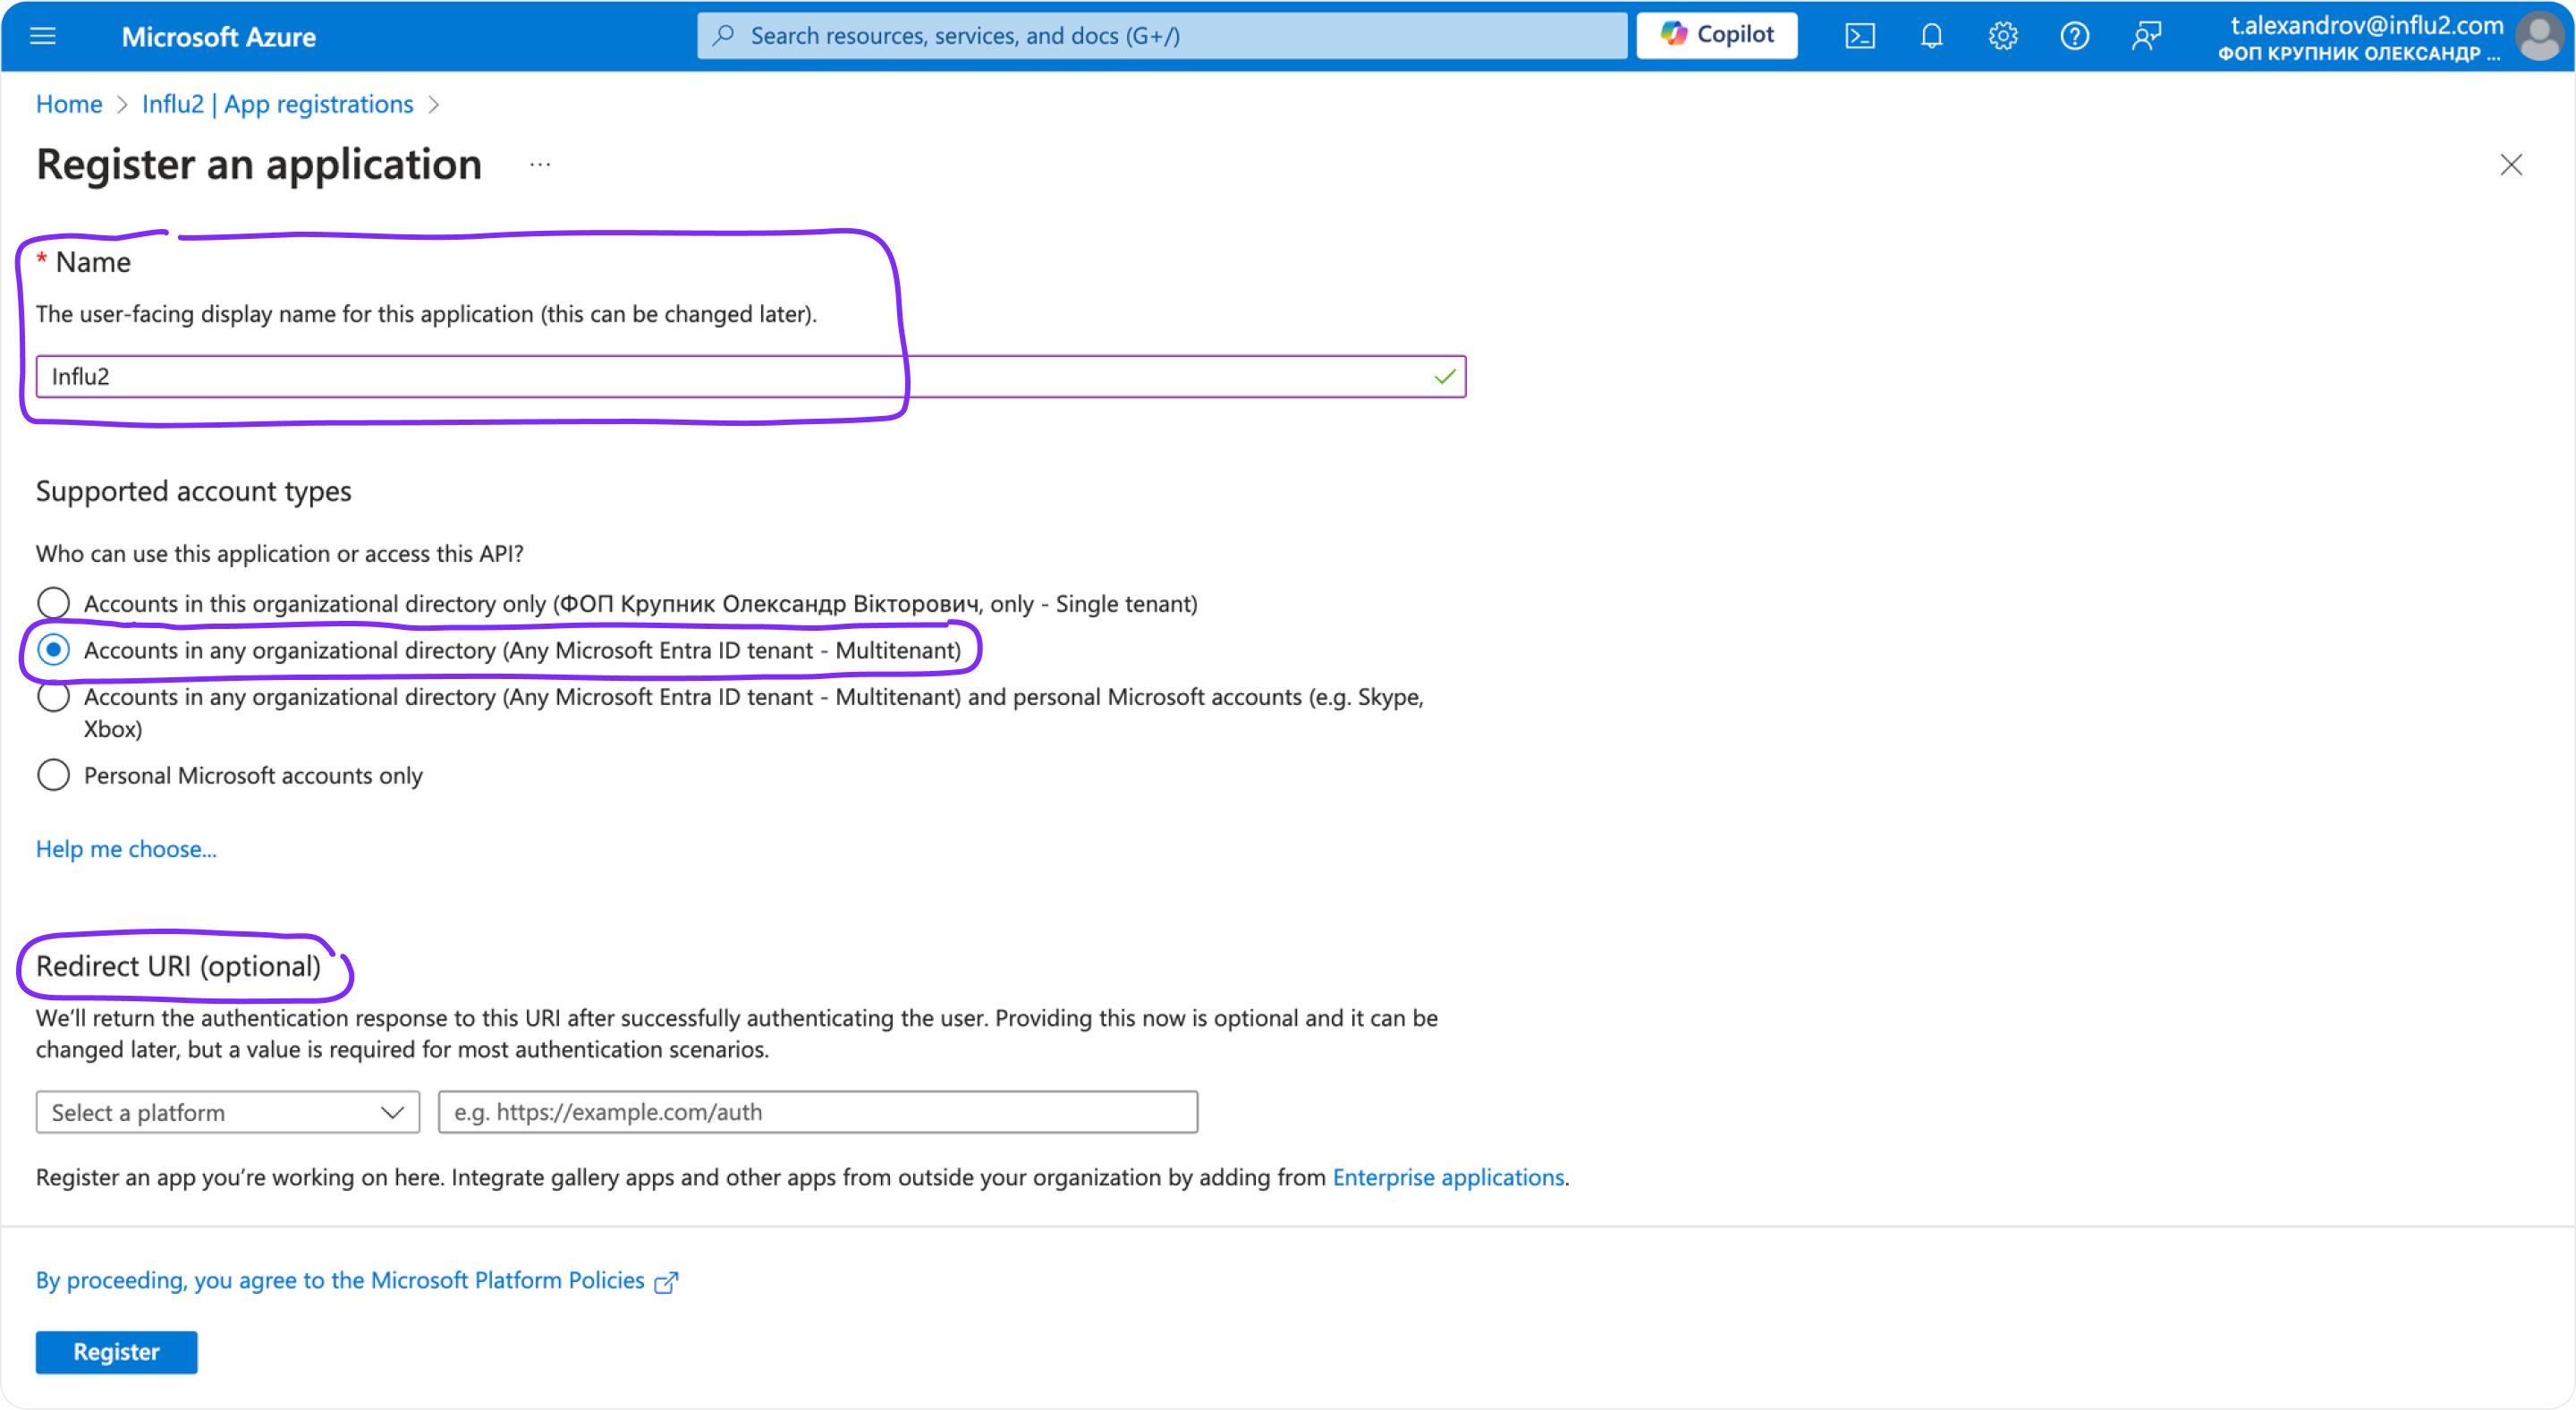
Fill in the registration details:
- Name:Influ2
- Supported account type:Accounts in any organizational directory (Multitenant)
- Redirect URI:https://v2.influ2.com/v1/api/auth/callback/entra
Click Register.
Step 2: Save your application identifiers
Once the app is created, you'll see important IDs on the app overview page. Save these and provide them to your Influ2 Customer Success Manager:
Application (client) ID
Directory (tenant) ID
Step 3: Generate an authentication key
Go to Application Registrations > [Your Influ2 App] > Manage > Certificates & secrets.
Click the Client secrets tab.
Click New client secret.
Provide a description (e.g., "Secret key for the Influ2 SSO application").
Set the expiration to 365 days.
Copy the following fields and share them with your Influ2 Customer Success Manager:
- Description
- Secret ID
- Secret Value
Step 4: Create app roles
You can assign three roles to control what each user can do in Influ2.
Open the app you just created and go to App roles.
Click Create app role.
Create three roles — repeat this step for each:
For the Admin role:
Display name:
AdminAllowed member types:
Users and GroupsValue:
AdminDescription:
Admin
For the Manager role:
Display name:
ManagerAllowed member types:
Users and GroupsValue:
ManagerDescription:
Manager
For the Viewer role:
Display name:
ViewerAllowed member types:
Users and GroupsValue:
ViewerDescription:
Viewer
Click Apply.

Step 5: Assign roles to users
Go to Enterprise Applications in your platform overview.
Find and select your Influ2 application.
Go to Manage > Users and groups.
Click Add user/group.

Select Users from the dropdown.
Select the user you want to add.
Assign one of the three roles (Admin, Manager, or Viewer) to the user.

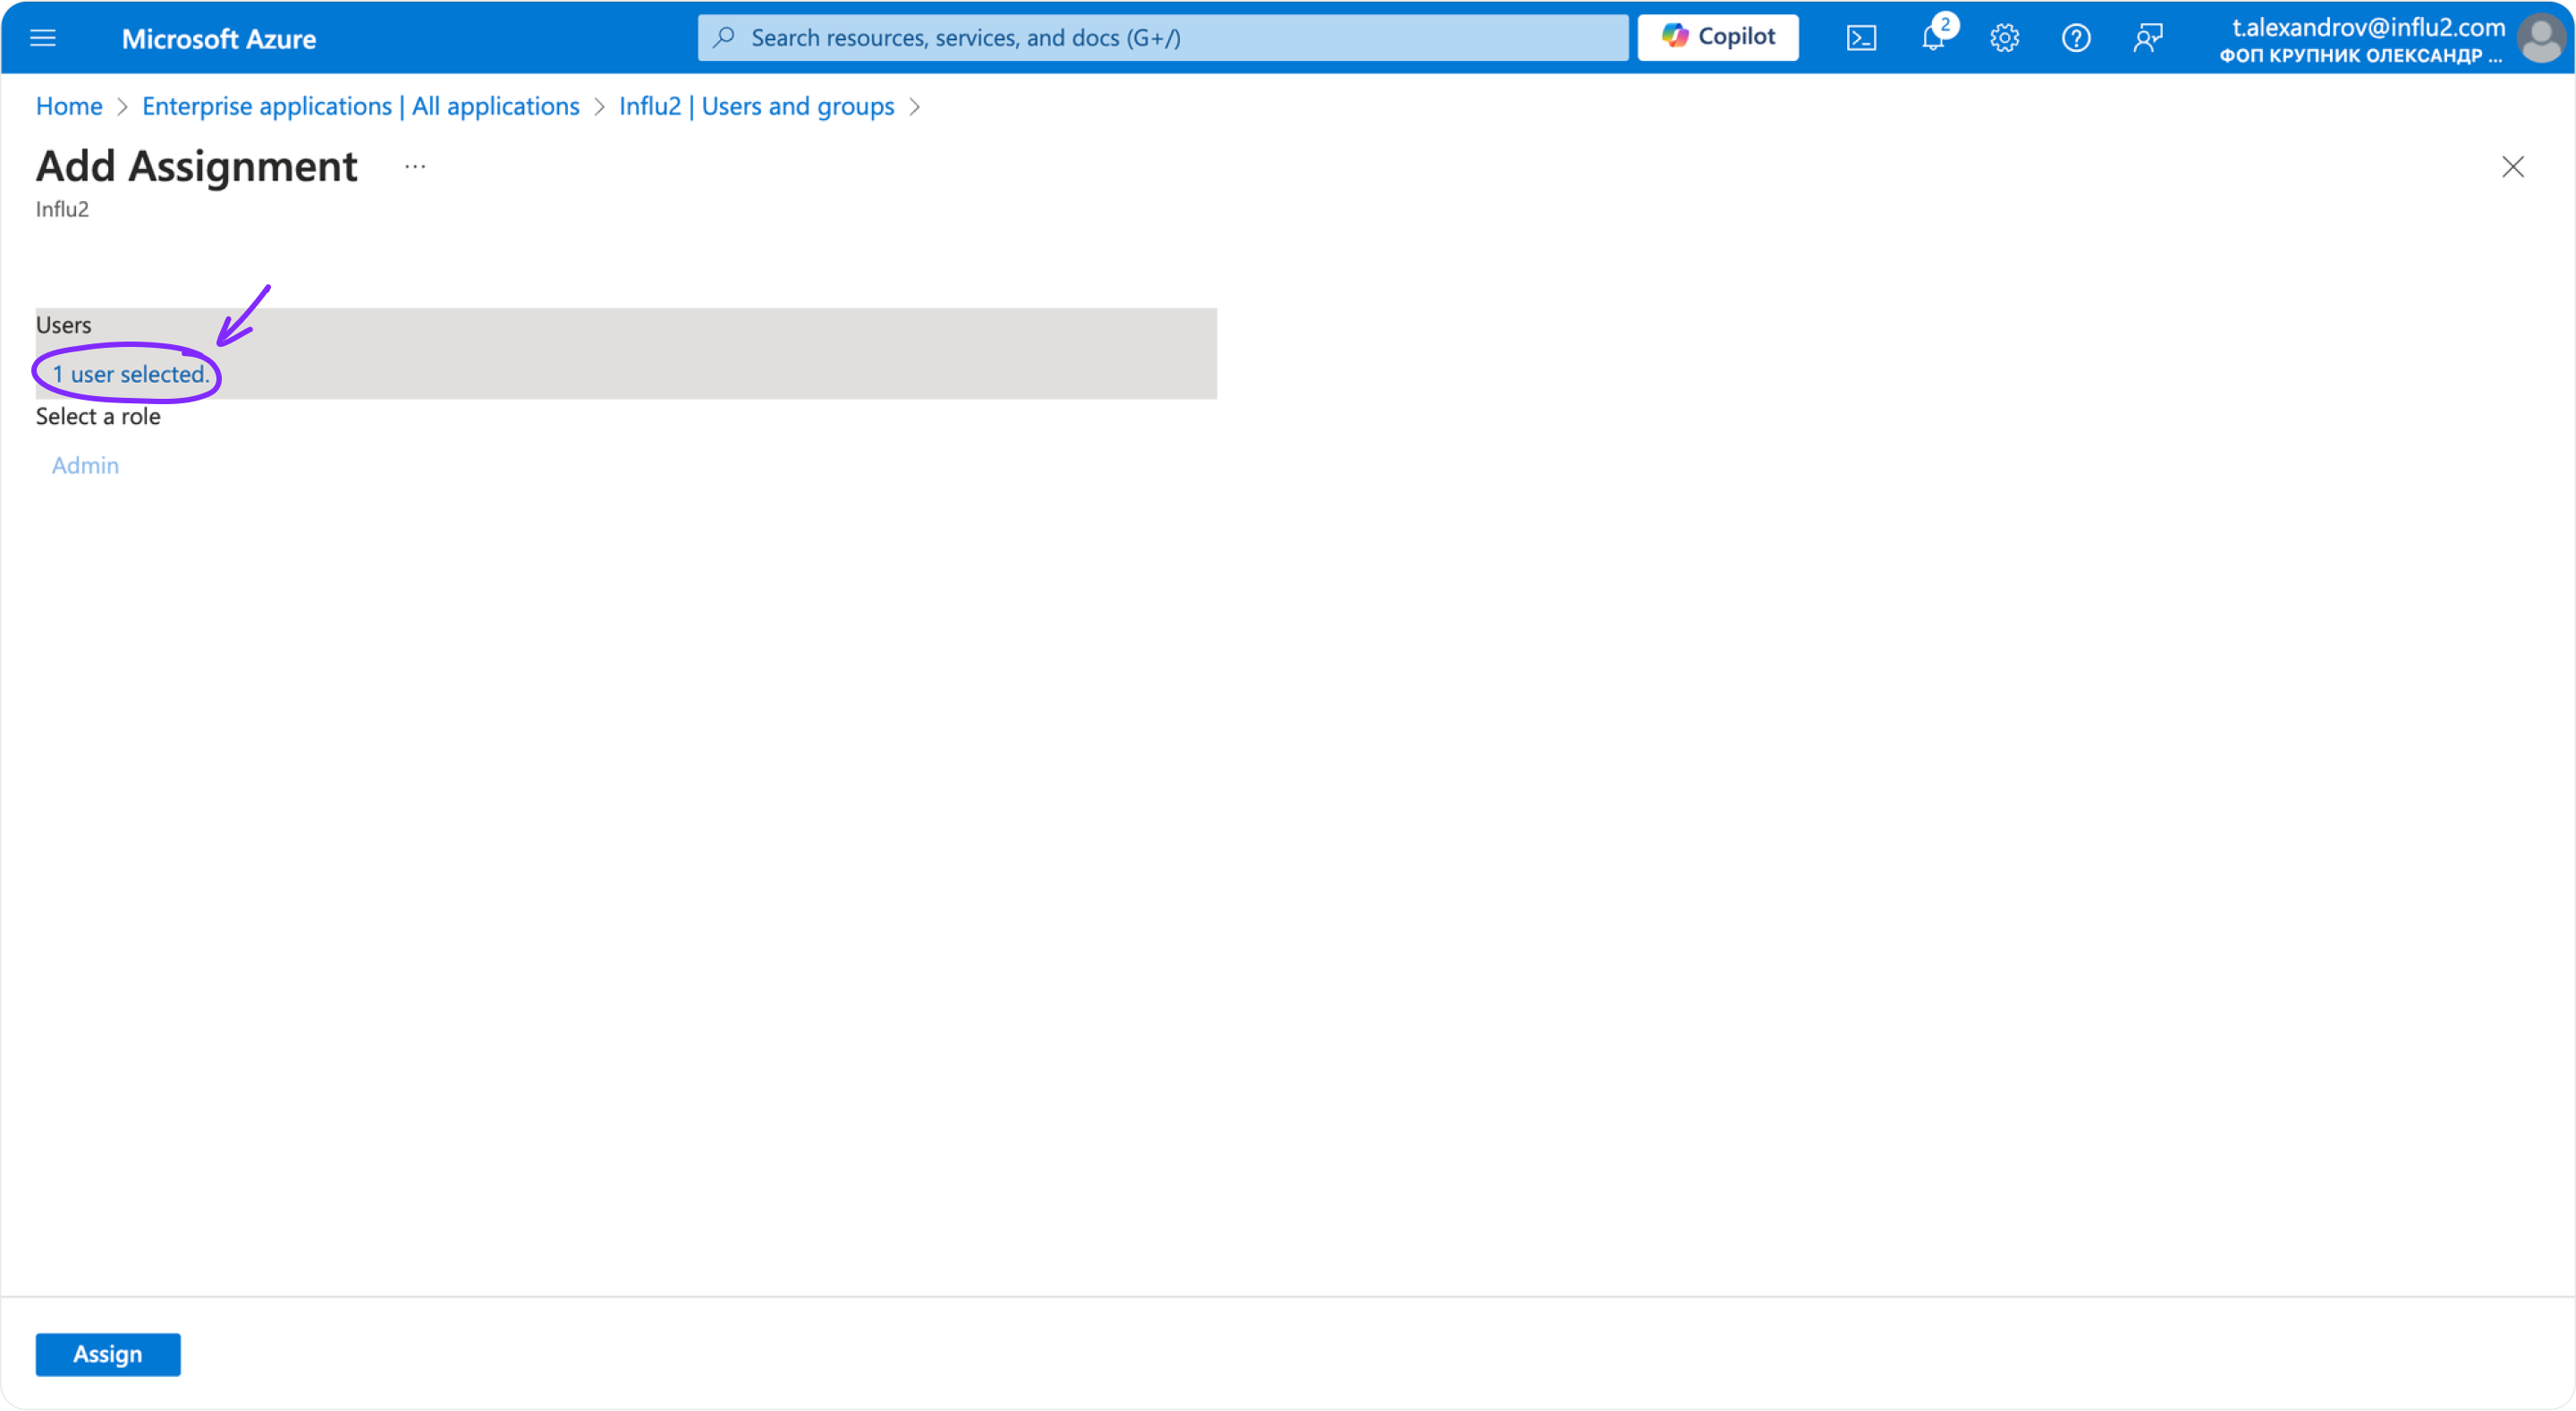
The selected user now appears on the Users and groups page with their assigned role and privileges.
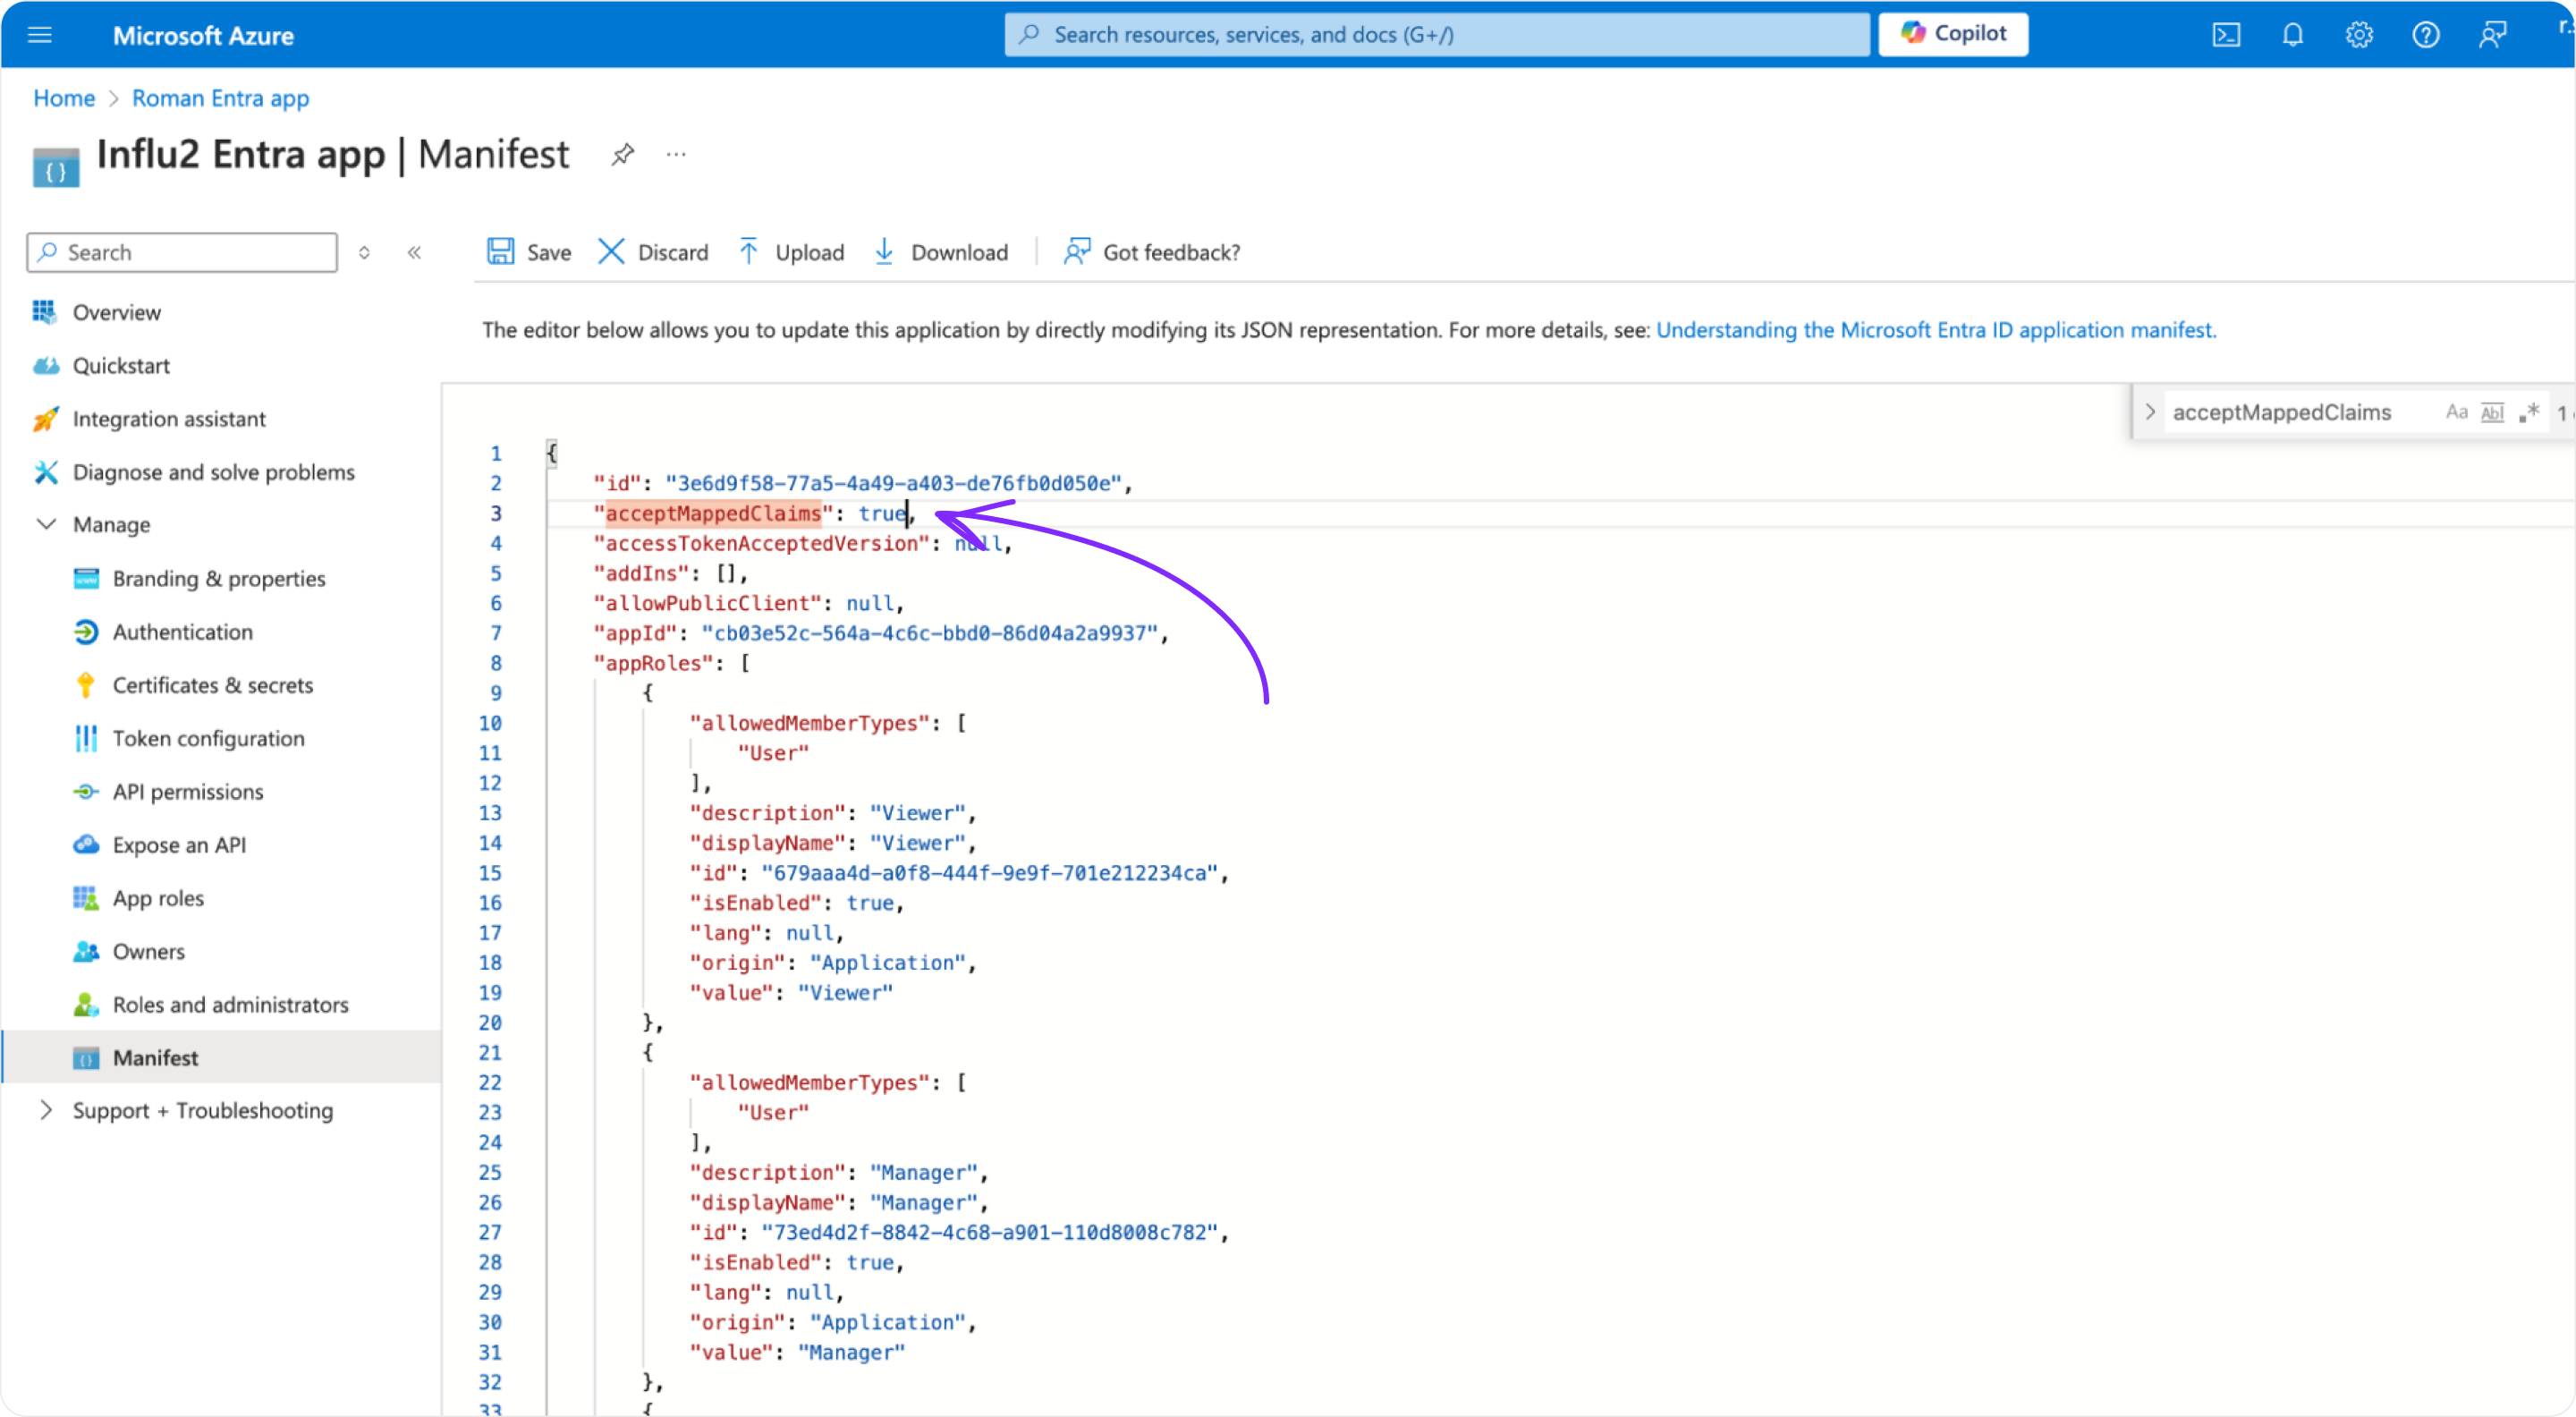
Step 6: Update the application manifest
Go to Azure Portal > App registrations and select your app.
On the left sidebar, go to Manage > Manifest.
Find the
acceptMappedClaimsfield (it should have anullvalue by default).Change the value to
true.
"acceptMappedClaims": true,
Click Save.
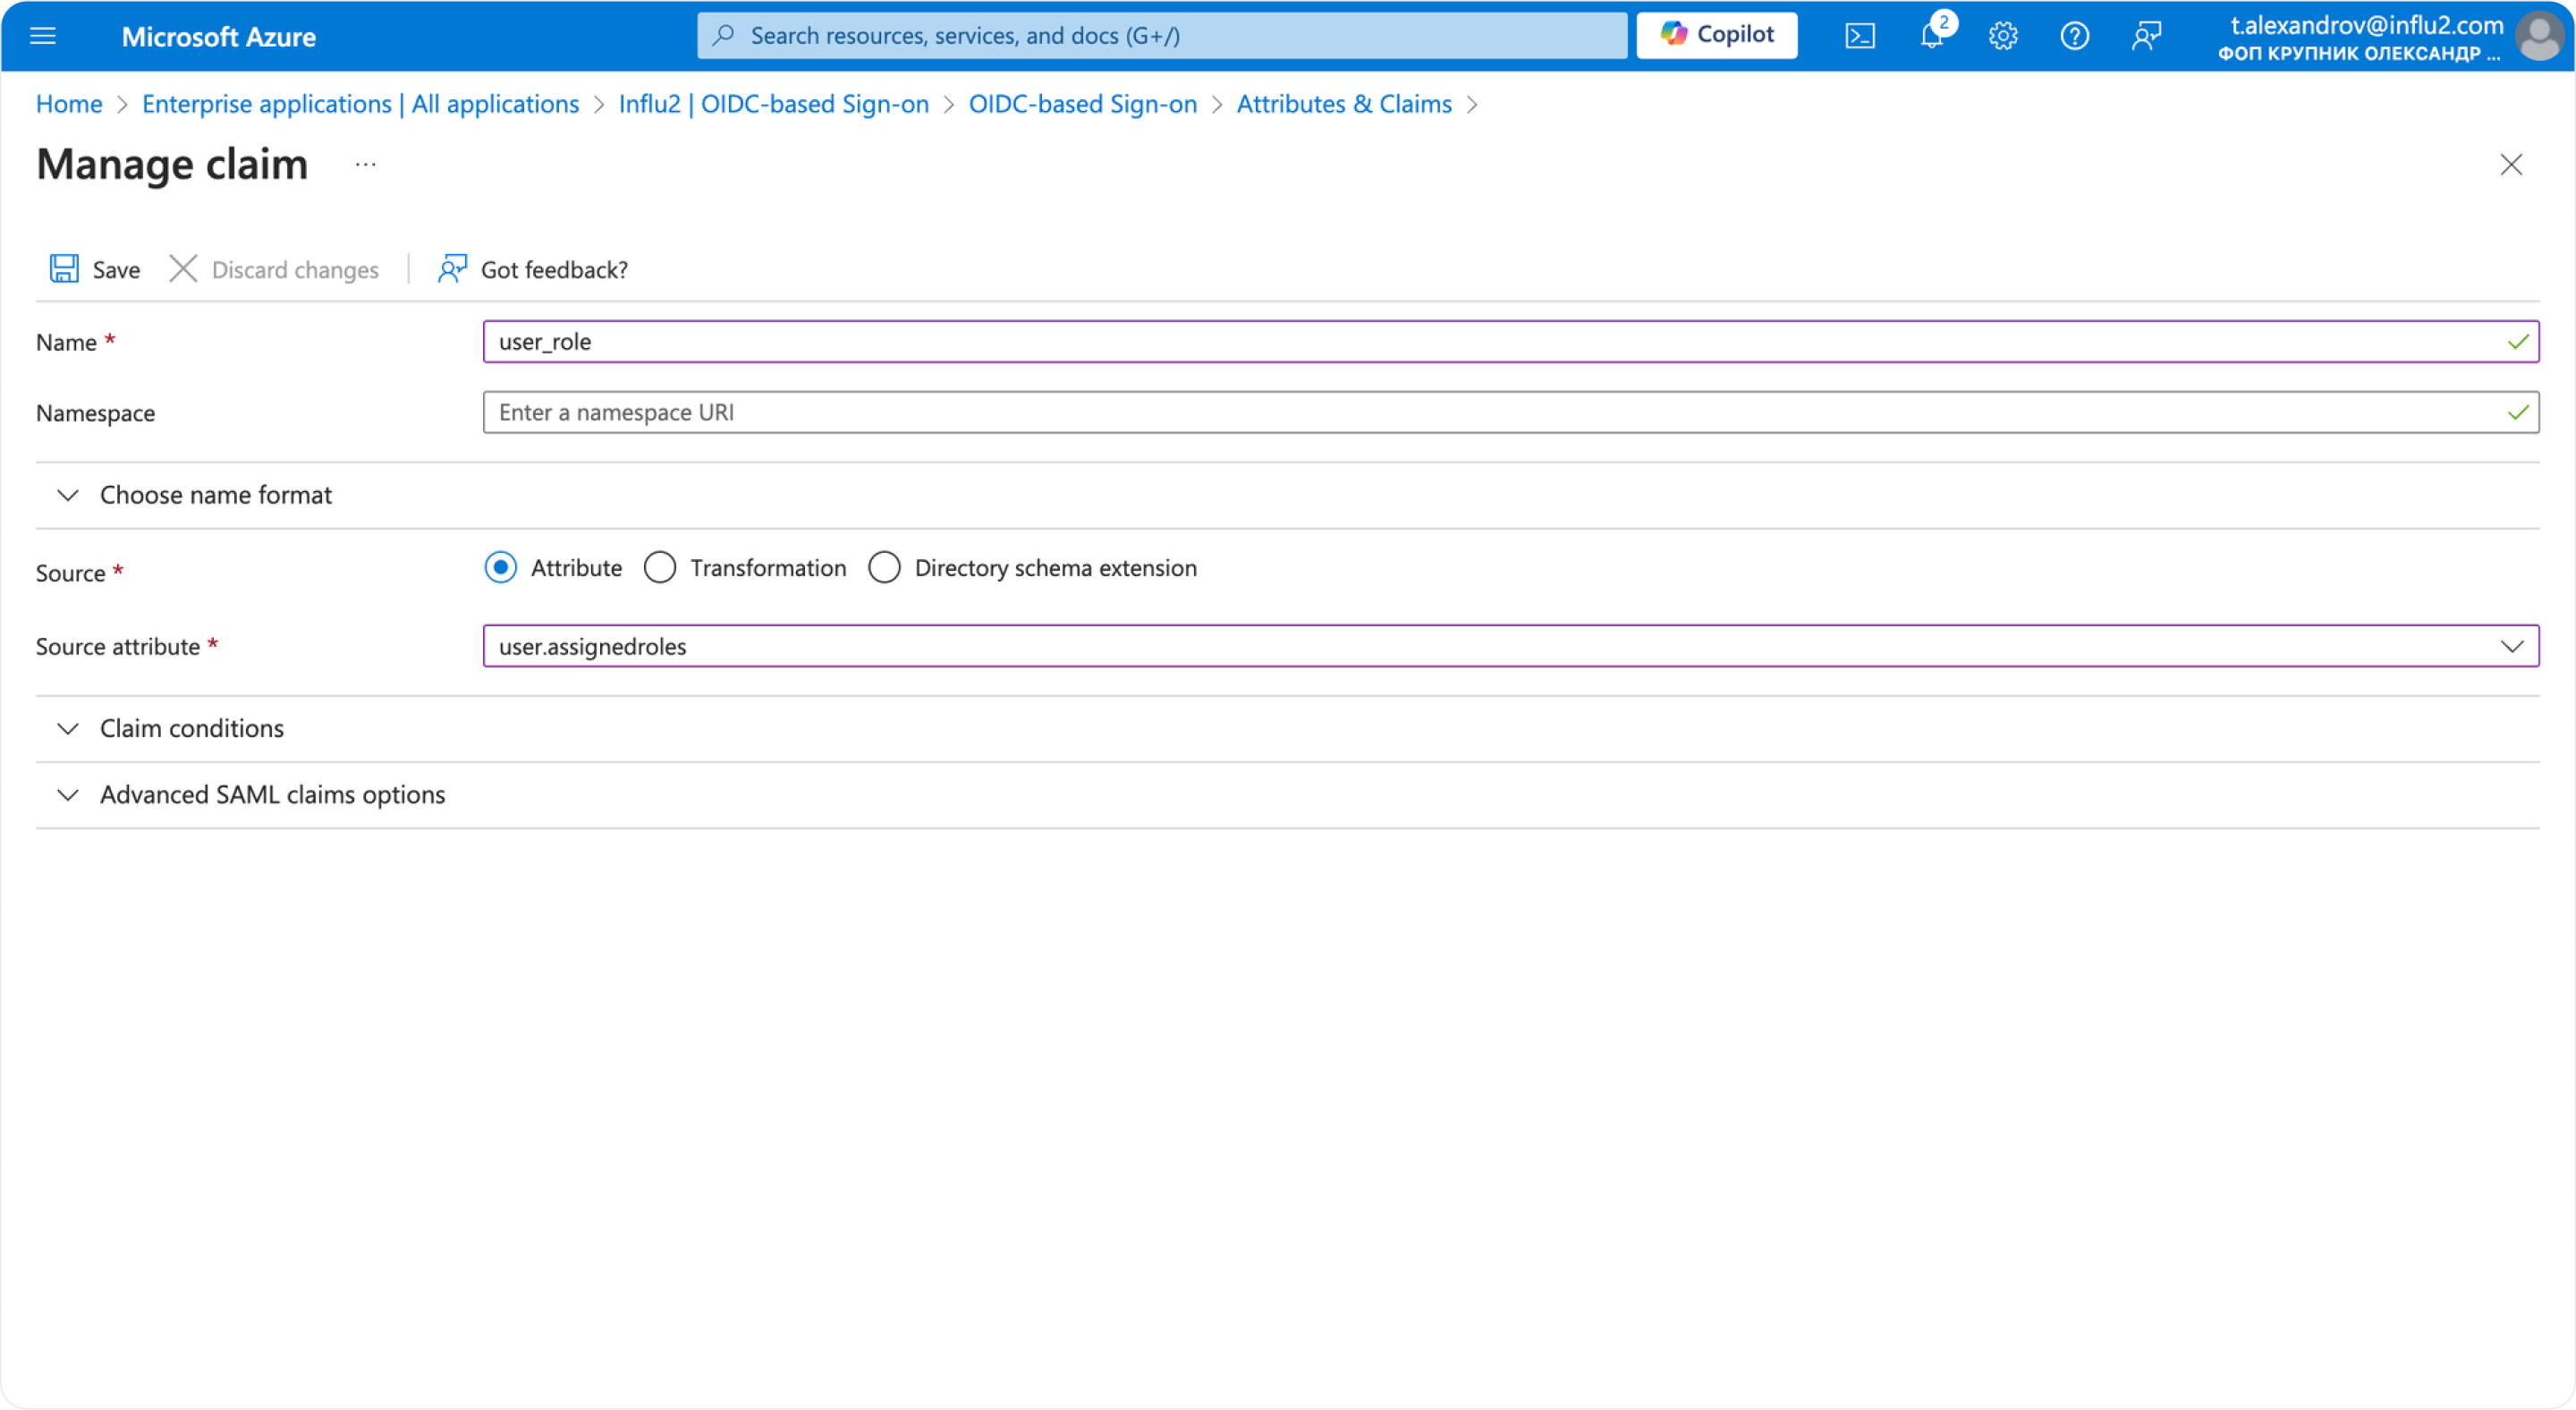
Step 7: Add user role claim
Open your platform overview and go to Enterprise Applications.
Select your Influ2 application.
Go to Single Sign-On.
In the Attributes & Claims block, click Edit.
Click Add new claim.
Enter the following values:
- name:user_role
- source:attribute
- source attribute:user.assignedroles
Provide information to Influ2
Once you've completed all steps, share the following with your Influ2 Customer Success Manager:
Description (from the client secret)
Secret ID (from the client secret)
Secret Value (from the client secret)
Application (client) ID
Directory (tenant) ID
Your CSM will coordinate enabling Entra SSO with the Influ2 dev team and confirm once it's live.
What's next
Your team can now access Influ2 using their Entra credentials. Roles assigned in Entra will automatically apply when users log in.