How to create a journey
Last updated: April 18, 2026
Influ2's Journey designer lets you set up automated, multi-stage campaigns that guide your target audience through the buyer's journey and connect them with sales when they're ready.
Understanding the buyer's journey
Think of the buyer's journey as a series of stages, with smaller steps within each stage. Stages represent distinct phases in a buyer's decision-making process, while steps define criteria to move prospects to the next stage.
You can use two types of triggers to move prospects through the journey:
CRM data: Criteria that indicates progress in your sales funnel (ex. opportunity stage)
Influ2 engagement data: Criteria that indicates engagement or interests (ex. meeting booked, target interests, recent outreach)
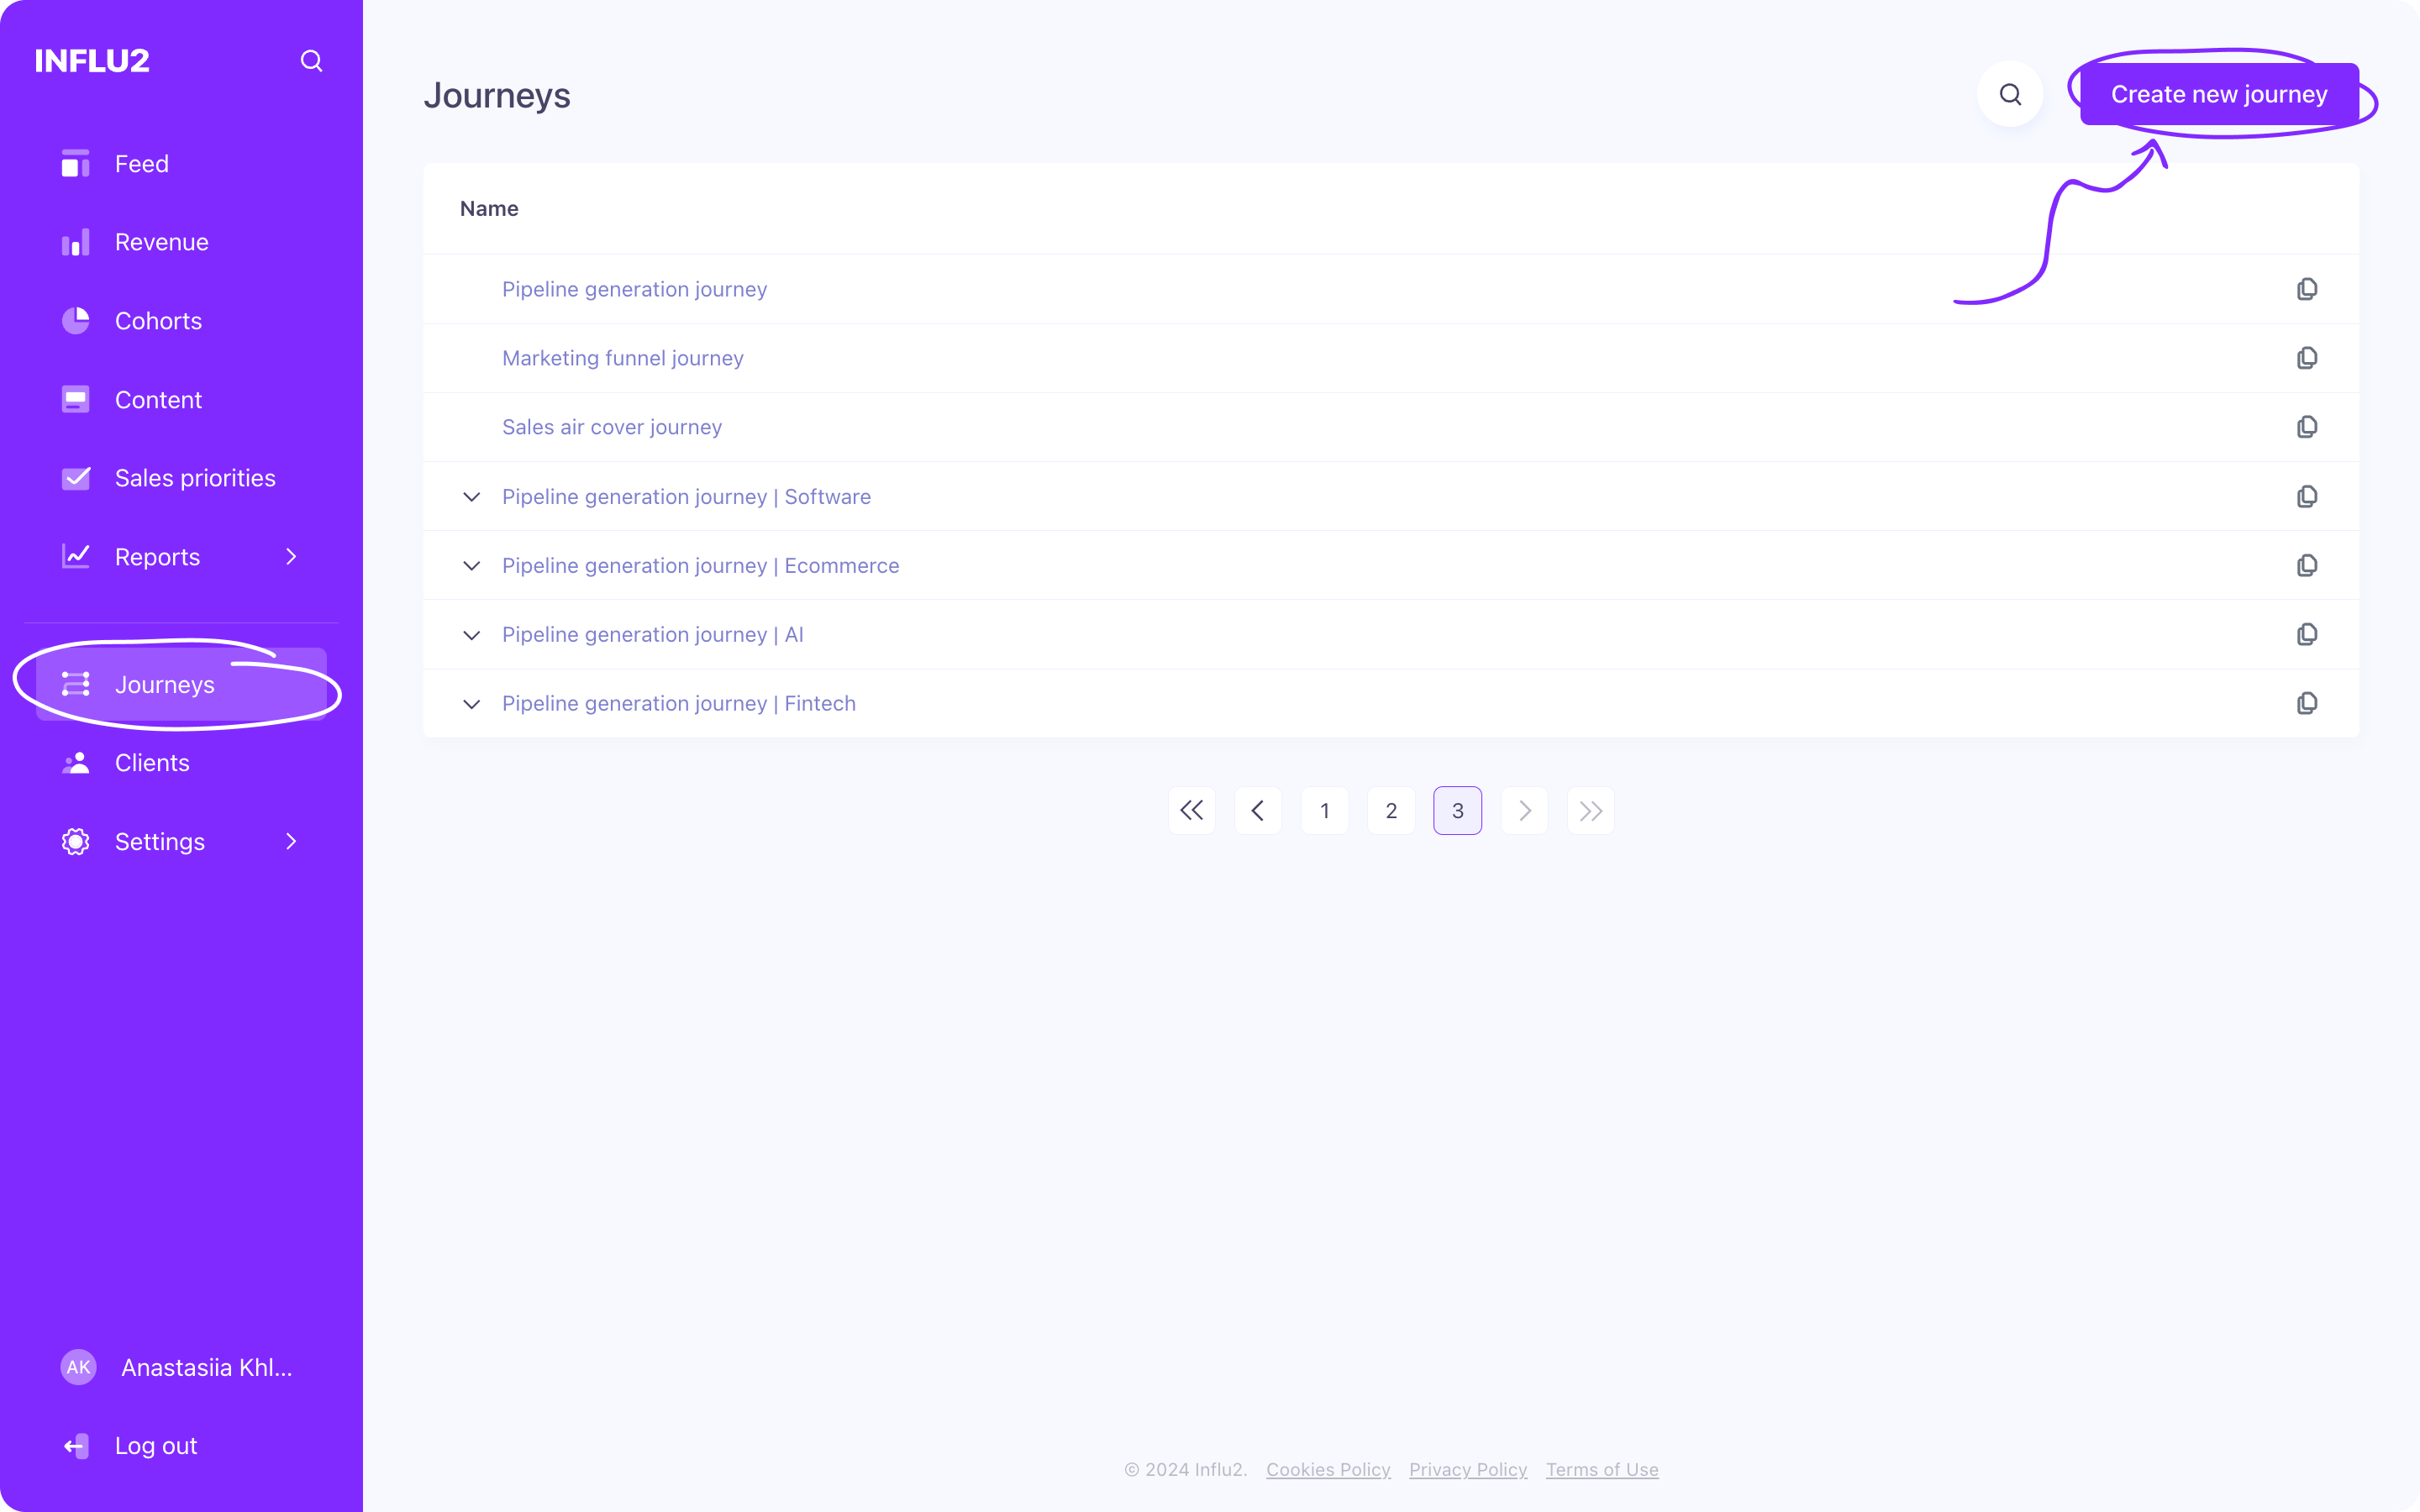
Create your journey
Go to the Journeys section of your Influ2 account and click Create new journey.
Give your journey a descriptive name.

Define stages for your journey. Each new journey comes with one default stage called "All cohort audience"—this is where your audience enters unless they meet criteria for another stage. You can rename this stage or leave it as is. (The default stage cannot be deleted or moved.)
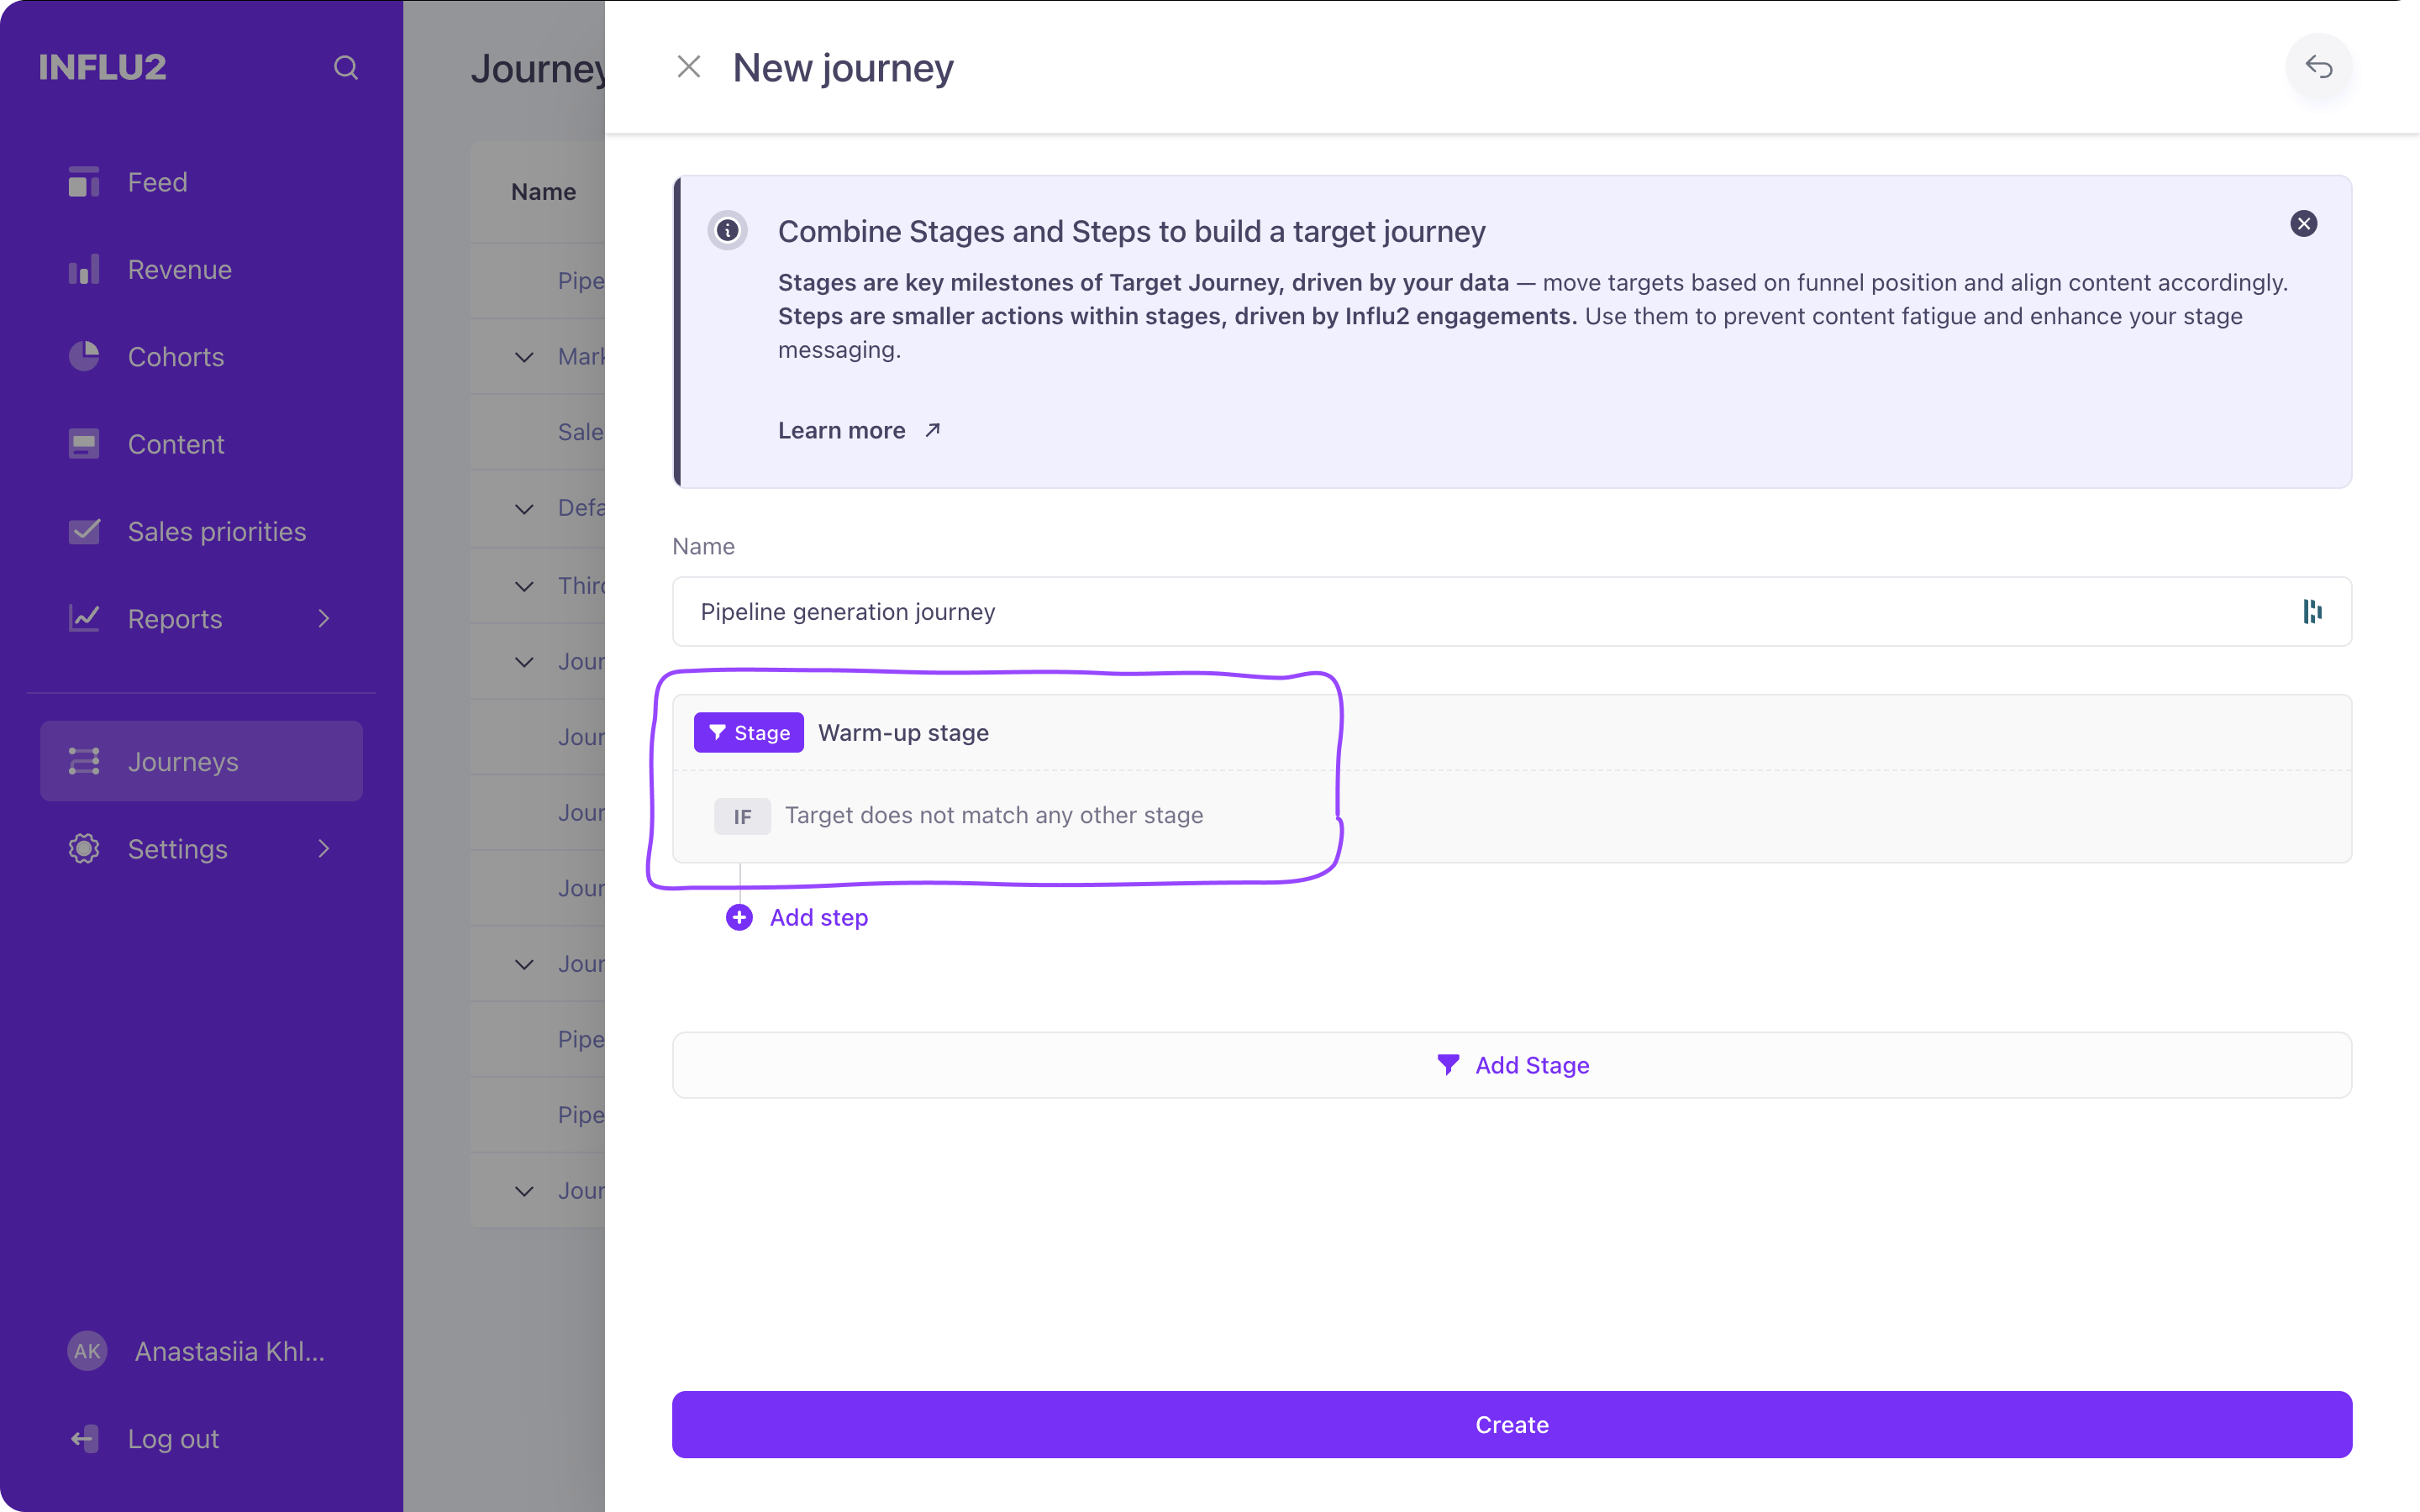
To add more stages, click Add funnel stage. Give each stage a descriptive name. (You can have a maximum of 15 stages per journey.)
Define the conditions that move prospects to each stage by clicking the If button. These are direct transitions—when you rearrange stages, these transition conditions reset.


Examples of stage conditions
Using Influ2 engagement data:
Meeting booked: Sales recently booked a meeting with this prospect. Show them specific content to prepare them for the call.
Target interests: This prospect showed interest in a specific topic by clicking an ad, or through detected intent signals. Tailor future content to focus on that topic.
Recent outreach / No recent outreach: The prospect has been contacted within the last X days or hasn't been contacted in X days.
Using CRM data:
Account, contact, opportunity, or lead details (for Salesforce users).

Opportunity stage conditions offer two settings:
Equals to: All opportunities matching this stage are added.
Has changed to: Only opportunities that reach this stage after the cohort launches are added. Opportunities closed before launch are excluded.

You can add multiple conditions for a stage. These work as OR logic—a contact needs to meet any of the criteria to be added to the stage. Combine them by clicking Or.

Create steps within stages
Within each stage, you can add multiple steps to change and advance ad content based on how each person engages. (You can have a maximum of 15 steps per journey.)
Click Add step below the stage and provide a descriptive name.
Define criteria for moving prospects to this step using the If button. These are sequential transitions—when you rearrange steps, conditions may reset.
Choose criteria from the dropdown. Available criteria include Influ2 engagement data (ad clicks, visits, impressions, days on stage, outreach touchpoints, etc.) and CRM data (contact, account, opportunity, or lead fields).


(Optional) Activate the Prioritized for sales toggle to flag prospects meeting this step's criteria for your sales team. These prospects will appear in the Sales priorities section of your dashboard.

Organize your stages and steps
If your journey has three or more stages, you can rearrange their order. A six-dot icon appears next to each stage—press and hold it, then drag to reorder. (The default stage must always remain first.)
Steps can be moved within their current stage only. Use the rearrange icon to adjust order.

To delete a stage or step, click the delete icon next to it. (You cannot delete the default stage.)

Finish your journey
Click Create to finalize your buyer's journey.
You can customize your journey further later—for example, by adding new conditions for stages—when you launch a cohort and assign it to the journey.
